How to mount your stitching in a frame
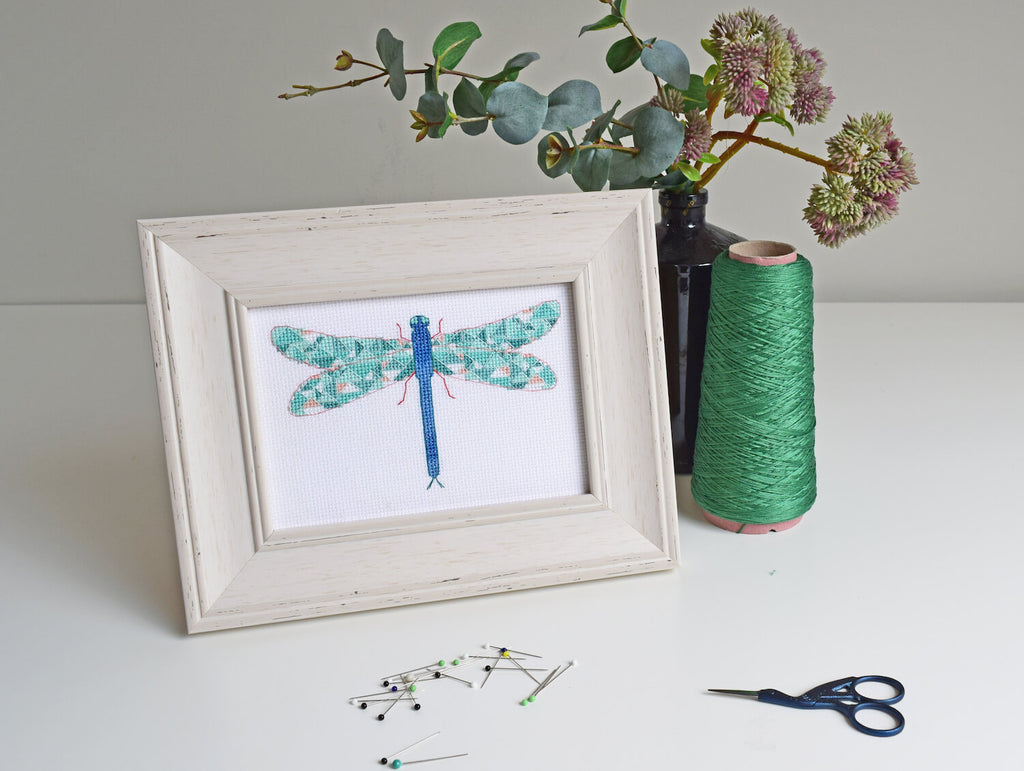
Why frame your stitching?
Framing embroidery is a beautiful and traditional way to show it off. It also preserves your stitching so that you can remove it from the frame and wash or remount it a different way at a later date. Also you can choose a frame with glass that will protect your stitching from uv light and therefore will prevent it from fading in sunlight. Taking it to a professional framer will be very expensive but it simple to do yourself at home.
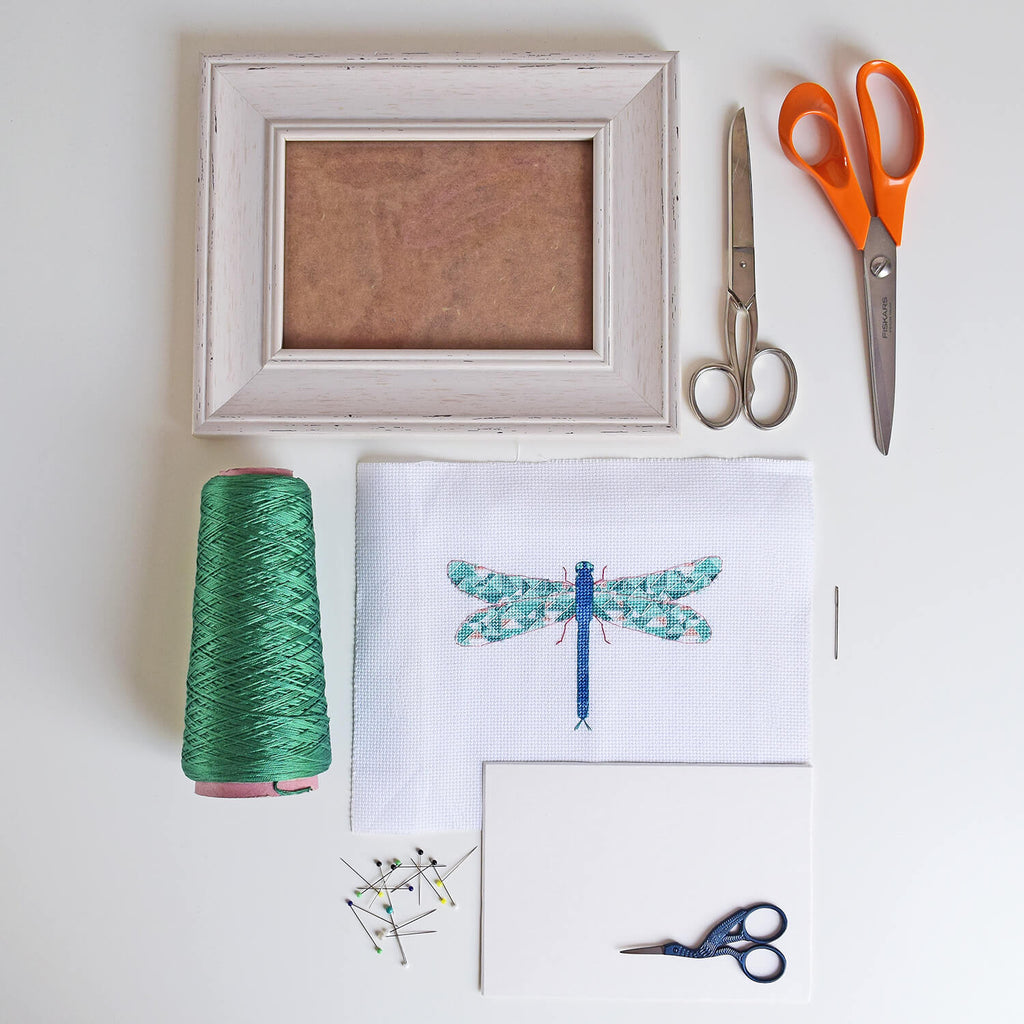
Things you'll need
- Your finished stitching
- Picture frame
- Acid free foam board or stiff/thick cardboard
- Pins
- Strong thread
- Tapestry needle
- Embroidery scissors
- Cardboard/paper scissors
- Fabric scissors
Step one - prepare your materials
Remove the backing from the frame, place it on your foam board or cardboard and draw around it with a pencil.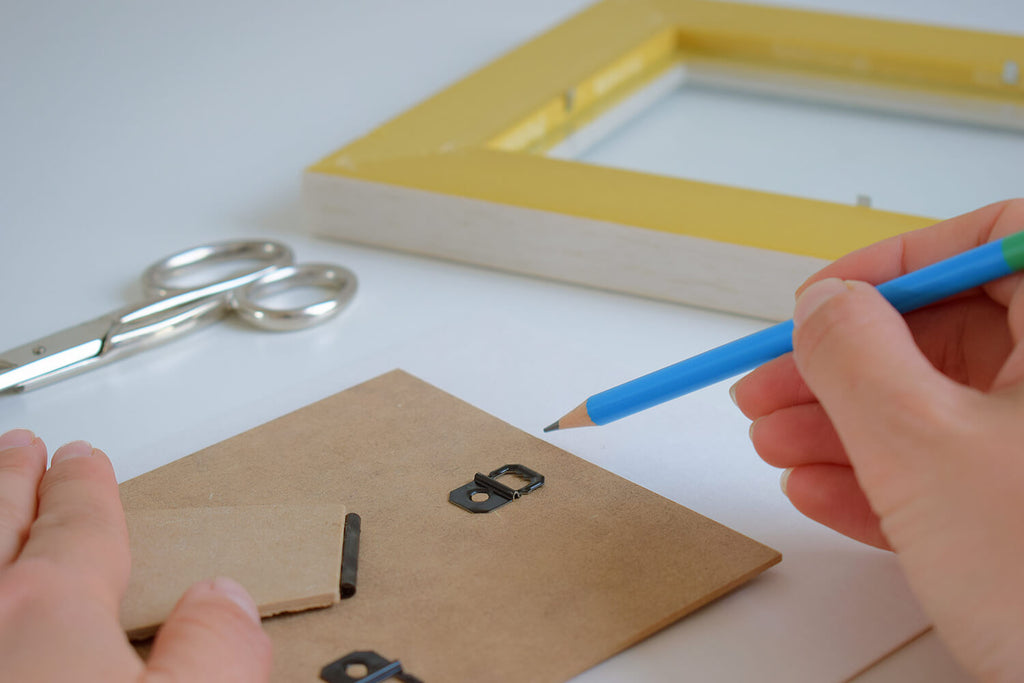 Cut out the cardboard just inside your pencil line by a couple of millimetres so that it will fit snuggly inside your frame. (Pop this cut out inside the frame at this point and close it all up again to make sure it fits)
Step two - pin your fabric
Wash, dry and carefully iron your finished piece of stitching (more help on that here if you need it). Place your fabric right side down on a clean flat surface, then position your cardboard cutout over the centre of your piece. If you need to, trim any excess fabric away from around the edge of your piece, so that it is at least 8-10 cm longer and wider than your cardboard cut out. Pin the centre of each side of the fabric to the edge of the board making sure your fabric is taut and wrinkle free. Turn your pinned piece over so that you can see the right side of the fabric and make sure you are happy with the positioning and that everything is straight.
 Now pin all the way around the outside edge.
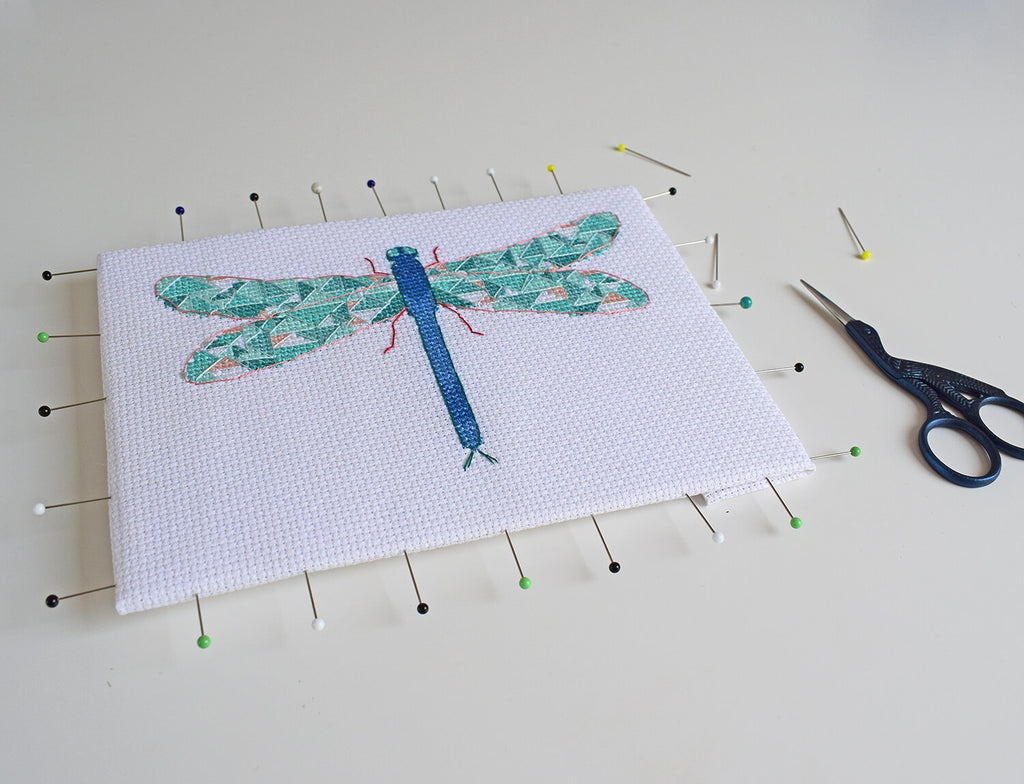
Step three - Start lacing
Thread your needle with a very long length of your strong thread (I use multiple strands of embroidery thread) and tie a big knot.
Turn the cardboard over so you are looking at the back, then fold down the raw edges of your fabric towards the centre of the board. Starting in one corner start making large zigzag stitches connecting the top and bottom edges, about 1- 2 cm from the edges of the fabric.
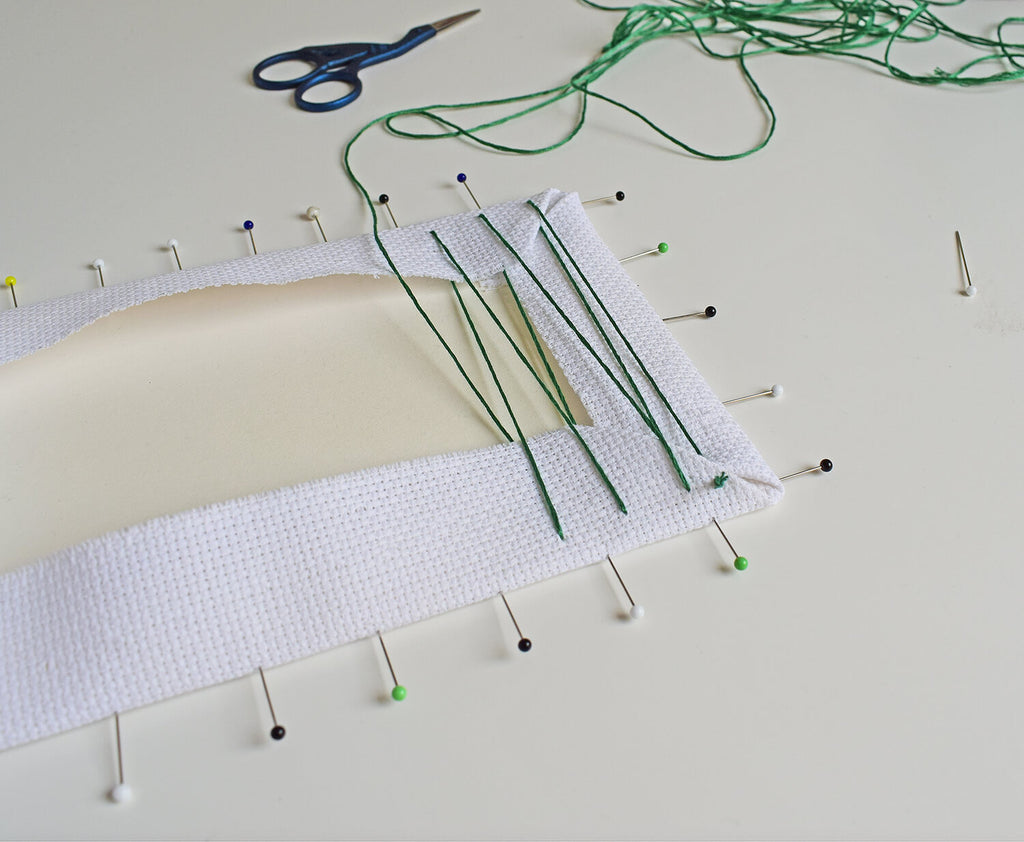 Stitch back and forth across the whole length, turning the piece over occasionally to make sure your stitching still looks nice and neat with no warping.
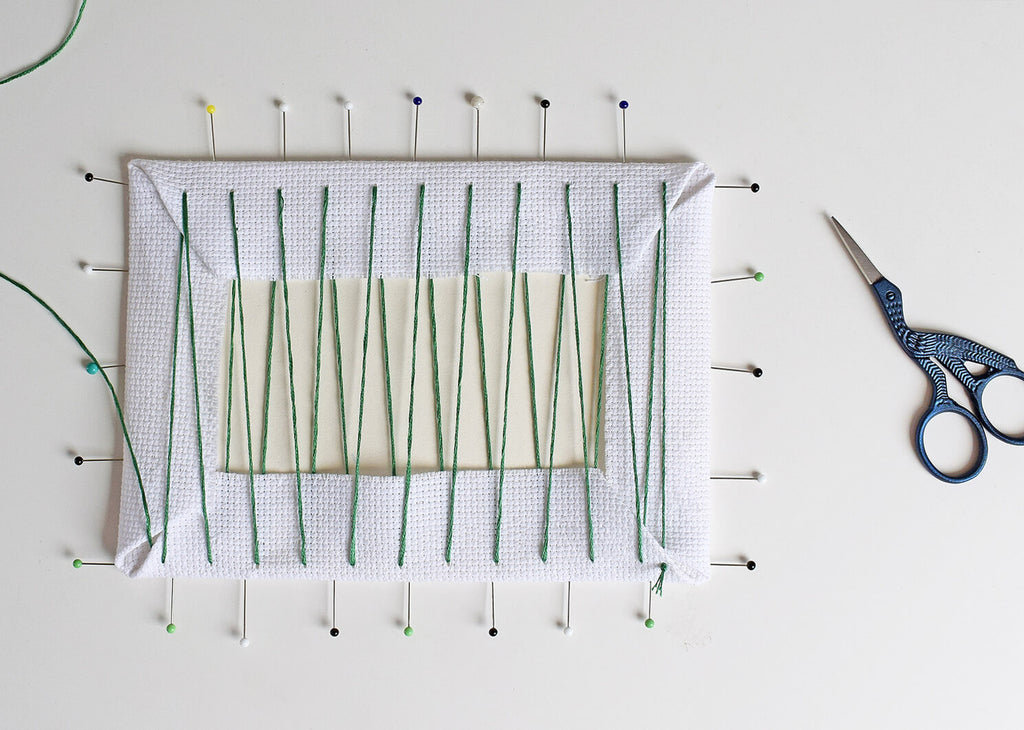 Remove the pins from the top and bottom edges, then gently start to pull the stitches taut moving along all of the stitches, starting at the knotted end.
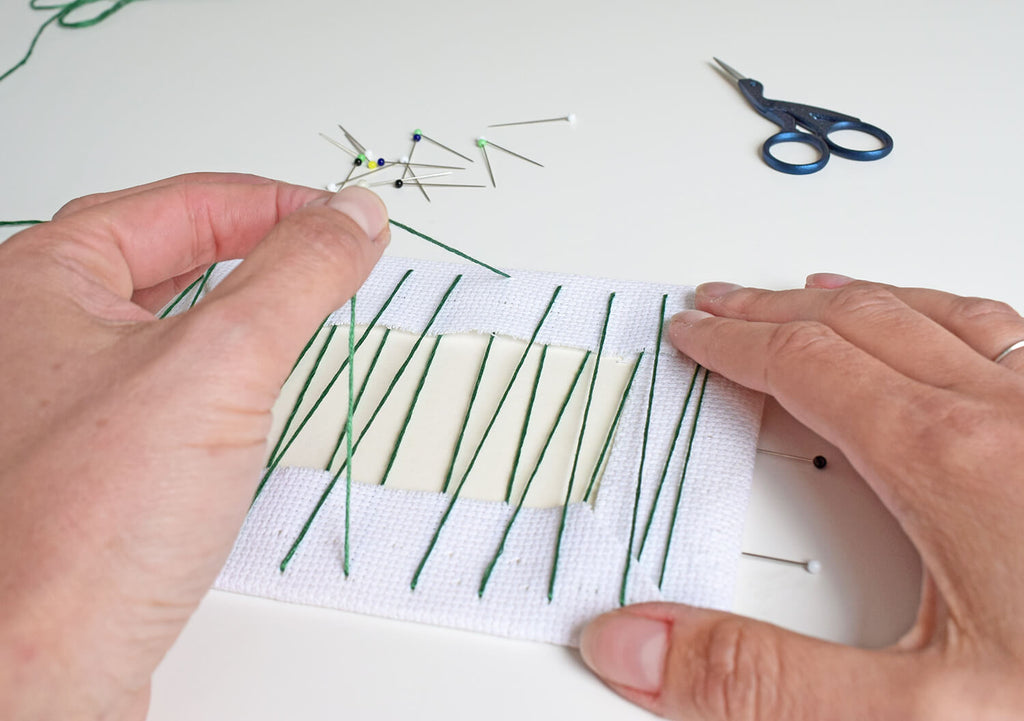 Secure the thread by doing a few over-stitches or tying a knot, but be sure to lose none of the tension. Now do the same thing, this time stitching horizontally.
 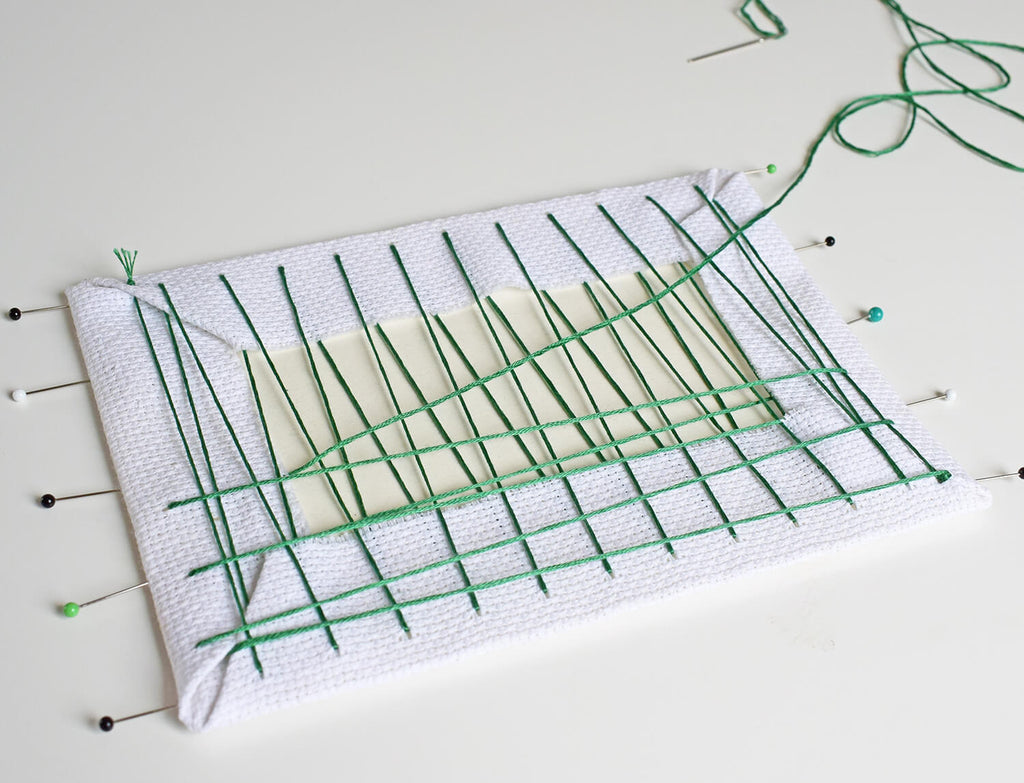 Once finished your stitches should form a grid.

Step four - Finish and hang
Place the stitching into the frame and replace the back and hang it or display it.